Last updated: November 2nd, 2023
Most of us love to take photos of our pets – whether it’s a quick snap of them doing something cute or crazy to post on social media, or something more like a portrait which will give you a lasting memory of a beloved friend for many years to come. However sometimes these photos don’t always turn out quite as we’d hope – maybe they are blurry, or they look too bright or too dark.
In this article, you’ll get some tips from an award-winning landscape and travel photographer. I’ll help you take better photos for you to keep and treasure for years to come. These tips aren’t just for cats and dogs – they are just as valid for other types of pet such as rabbits, lizards and birds.
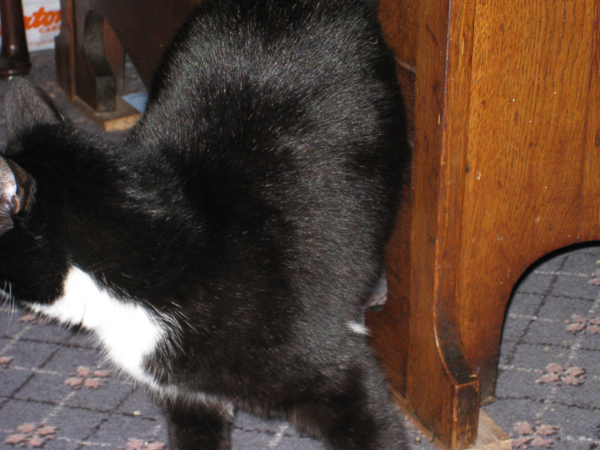
Do Your Photos Look Like This?
With the advance of smartphone technology, most people these days have access to good quality cameras built-in to their phones so almost everyone has a camera with them virtually all of the time. Although you can spend a lot more on more advanced pocket-sized Point & Shoot cameras, or even Digital SLR cameras, the advice here is valid whichever camera you have.
1. Composition
When you take a photo, it’s natural to want to position the subject in the middle of the scene. However if you look at photos and paintings that are pleasing to the eye, most of the time you’ll notice that these obey the “Rule of Thirds”. To explain what this is, imagine there are 2 vertical and 2 horizontal lines spaced equally across the image. The Rule of Thirds is a guideline that suggests that important elements of the photo should be placed along these lines or the intersections. For example, this landscape image below has the main focal point of the image in one intersection, and the green grass, dark background and purple sky all sit roughly in the 3 horizontal thirds of the image.
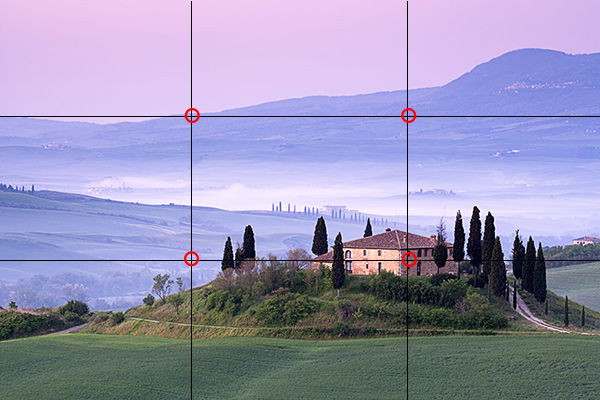
Rule of Thirds
You can use this to good effect with close ups, making sure the eye of your pet sits in one of the intersecting areas. Another useful tip is that if your pet is looking to the left or right of the photo, it generally looks more balanced if they are looking into the photo (i.e., there is more space in front of them than behind them). See the photo below for an example of this – there is more space to the left, which is the direction the eyes are looking.
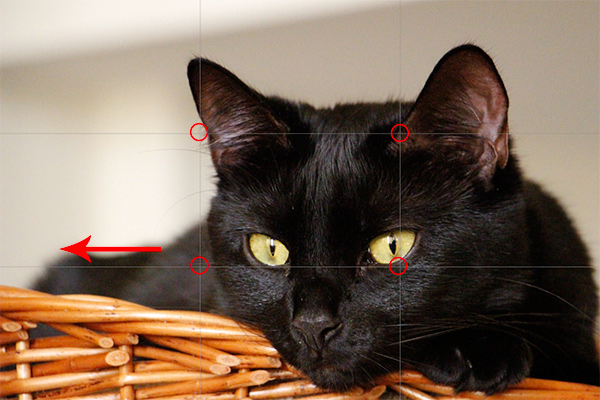
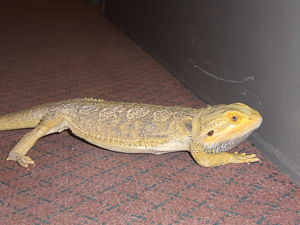
Photo Composition
Of course, rules are made to be broken so while they are a good guide, there’s nothing to say you can’t get good photos with your pet right in the centre of the photo! Sometimes it’s worth experimenting with cropping the photo too, as different formats can work well. This is also useful if there is something distracting in the background. The image below works really well as a square format, with the face right in the centre.
Square Format Photo
2. Background
If you’re anything like me, there’s always something lying around the room – whether it be cat toys, magazines or even piles of washing waiting to be sorted. This doesn’t really add anything to a photo of your pet, and can make for a distracting background. So before you take the photo, have a look around the whole scene to see what you’ll see in the final image. If there are things in there that shouldn’t be, then either shift them out the way or adjust the position of the camera. Sometimes just moving a few inches up, down or to either side can make a big difference.
Another tip is to stand further back and zoom in. This has the effect of reducing the amount of background in the image – try it out and see how much difference it makes! The photos below show the difference between taking the same photo at either end of a 24-70mm zoom range. You can see how much more of the background is visible when it was taken at 24mm (on the left) compared to at 70mm (on the right). Even longer lenses will exaggerate this further, although you need to make sure the shutter speed is still high enough to produce a sharp photo, as the longer the focal length, the higher the shutter speed required to get a sharp image.
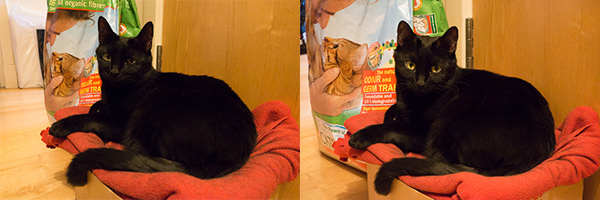
Zoom in to Minimise Background
3. Height
It’s natural for us to take photos from our normal standing position, but this usually means you are looking down onto your pet. You can get much more natural looking photos by bending down and taking the photo from their level. This is easier to do with cameras that have a folding rear screen, but try getting down to the floor and seeing how different things look from your pet’s eye-level.
Take Photos at Your Pet’s Eye Level
4. Exposure
When you take a photo, your camera automatically works out how much light is available, and adjusts its settings so that the exposure is correct. Modern cameras are very clever at working this out, so usually the photo you get is pretty much what you expect. However they don’t always get it right. This is because they assume that the image is a neutral tone, so extremes of white and black can confuse the camera. For example, if you’re taking a photo of a white cat in the snow, it will often come out darker, and the opposite is the case if you take a photo of a black dog – it will look more grey.
The photo below shows examples of underexposure (image is too dark), overexposure (image is too bright) and the correct exposure.
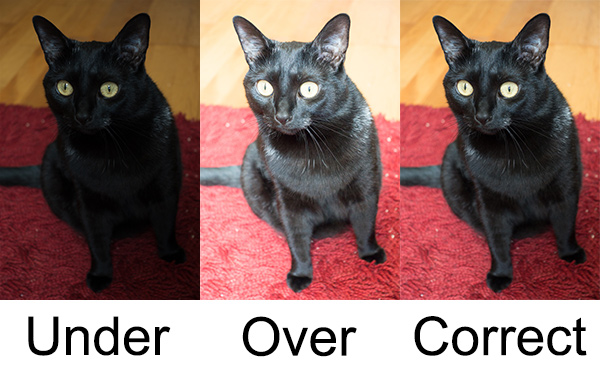
Exposure Examples
You can easily correct this by adjusting the exposure before you take the photo. For iPhone users, you can do this by simply touching the screen just before you take the photo and sliding your finger up or down to make the image brighter or darker. For cameras with manual adjustments, you’ll need to look for the +- button and adjust it to either -1 to make the image darker, or +1 to make it lighter.
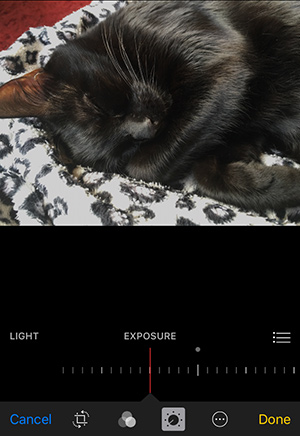
Adjust Exposure on iPhone
If you forget, don’t worry – you can easily adjust this in most photo editing apps, including the Photos app that comes as standard on iPhones.
Just click Edit, then the dial icon at the bottom, and slide your finger across to make the image brighter or darker. In this example, I’ve adjusted it by minus 1 stop to make the image slightly darker (a stop is a photography term to measure differences in exposure – it’s marked by the brighter small lines in the scale to the right).
It’s always better to get this right in the camera though, as the original image will only contain a certain amount of information, and if you adjust it too much it can lose quality.
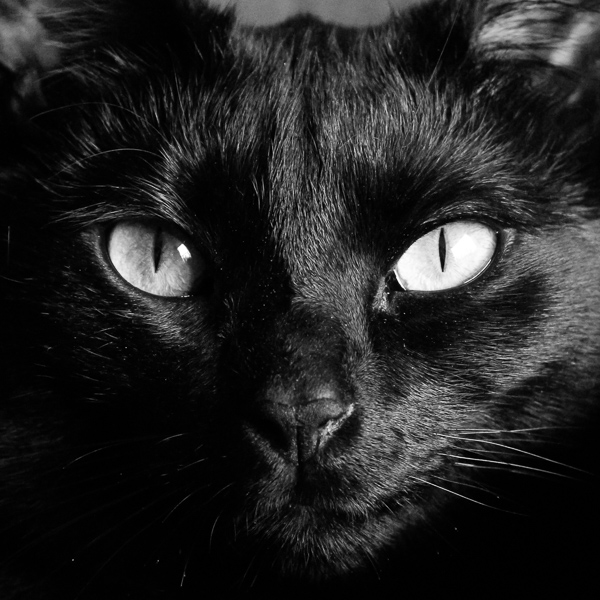
5. Focus
Good composition and perfect exposure won’t count for much if your photo is out of focus. Take care when you press the shutter to make sure that the subject is in focus. Virtually all cameras have autofocus as standard, but sometimes they lock on to the wrong area in the photo or don’t manage to get it in focus at all (especially if it is dark).
Make Sure Your Subject is in Focus
If you look at any portrait (person or animal), you’ll notice that almost every time the eyes are in focus. This gives the image more impact than if other features are in focus, so it’s always good to make sure this is the case in your photos too. So when you’re taking a photo of your pet, aim to get the eyes in focus either by moving the focus point manually if your camera has this option, or by tapping your finger on that part of the image if you have a camera with a touch screen or smart phone.
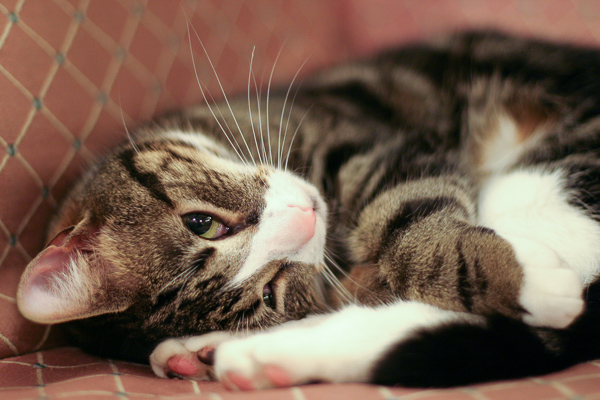
Due to what is called Depth of Field, not all of the photo will be sharp. Depending on the lens size, camera type and aperture setting you (or the camera) select, the amount of the photo that is sharp can vary considerably. This is useful if you want to draw attention to the subject of the photo, but have the background blurry such as in the photo below.
This is adjustable on DSLRs and all but the most basic Point & Shoot cameras. The aperture (size of the lens opening) is what determines this, so to make more of the image blurred, you need to use a larger aperture, and if you want more of it in focus, you need a smaller aperture. The size of the aperture is measured in f-numbers, and the smaller the number the larger the aperture. So f2.8 is larger than f8, and will mean more of the background is blurred.
Focus on the Eyes
Another useful tip is to click your fingers, or make a noise to attract your pet’s attention so that they look directly at the camera.
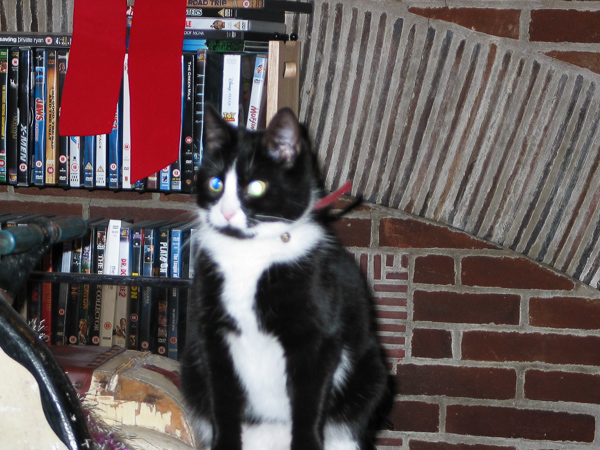
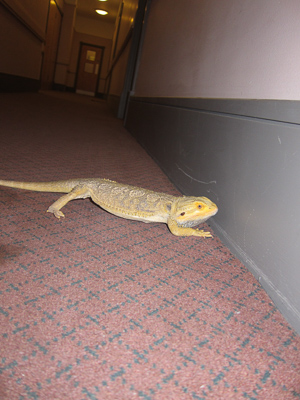
6. Orientation and Cropping
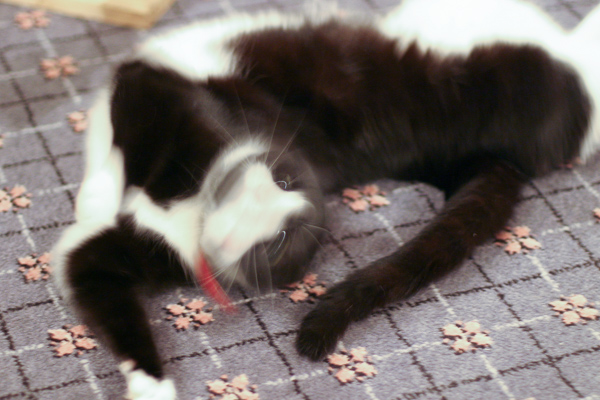
Room for Improvement
A lot of photos are taken with smartphones these days, and it’s natural to use them in the vertical (Portrait) format, however you can often get more pleasing results by turning the camera 90 degrees to Landscape format.
Also don’t be afraid to zoom in and focus on just one part of your pet – there’s no rule that says you need to include all of them in every photo. It can make a much more striking image if you zoom in to just get their face, or even part of it.
This photo could be improved by using the Landscape format, and zooming in closer so there wasn’t so much carpet in the foreground. It would also be improved if it was straightened so it wasn’t at a wonky angle.
Much Better
With a quick edit to change the orientation and straighten it up, this version of the photo above is much better. It removes a lot of the distracting background and foreground, and puts the focus on the subject of the photo.
However by getting this right in the first place, it saves spending time editing it afterwards so it’s always worth spending a moment considering the best way to fit your pet in the image.
7. Light
When a camera takes a photo, it needs to receive a certain amount of light to capture the image, and the time this takes is called the Shutter Speed. This varies depending on the amount of light, and also other settings on the camera (ISO and aperture). When there is a lot of light (outside on a sunny day for example), it doesn’t take very long to record the image. If however there isn’t as much light (for example indoors with dim lighting), then it takes longer to record the same image and if the subject (or the camera) moves in that time, the image can be blurry if the shutter speed is too low.
Use a Fast Shutter Speed to Prevent Blurred Photos
If shutter speeds are too low with the available light, then you need to increase the amount of light in the scene either with additional lighting (e.g., turn on some more lamps or open the curtains if it is daytime) or use a flash. The only downside of using a flash is that the built-in flash on most cameras is very harsh, and doesn’t give great results so it’s always better to use natural light where possible.
It’s also advisable to have the source of light behind you, so you are not taking the photo with the camera pointing into the light. This can result in the subject being very dark, with the rest of the photo being very bright.
8. Take Lots of Photos
As with all things in life, practice makes perfect, so the more photos you take and look at, the better your results will be. By taking more photos, you’ll see what makes them work or not, and you’ll also become more experienced at adjusting your camera for the conditions.
While all this advice is useful to get the best photos of your pet, it can take a moment or two to think about the settings and composition, by which time your pet has got distracted and wandered off. So if in doubt, snap first and then work on getting a better version of that photo. Sometimes something is better than nothing!
Practice to Improve
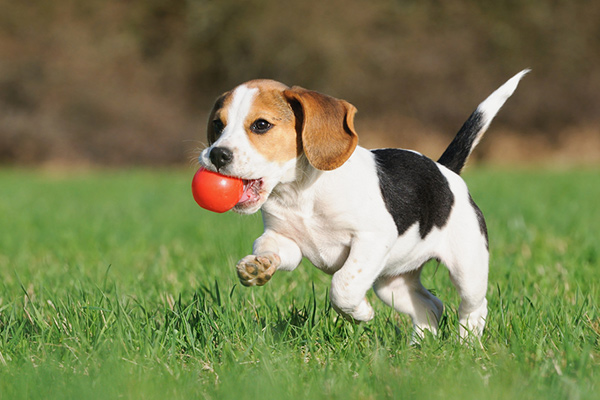
9. Show Your Pet in Action
It’s easier to take good photos of your pet when they are relaxed or sleeping, however sometimes it’s good to try and get some action shots too.
A good lens and fast shutter speeds are useful here, so this will be easier to do with better quality cameras such as a DSLR. Also, lots of light will be useful to obtain those fast shutter speeds you need to get the action sharp.
An additional pair of hands will also come in handy, so they can play with your pet while you concentrate on taking the photo.
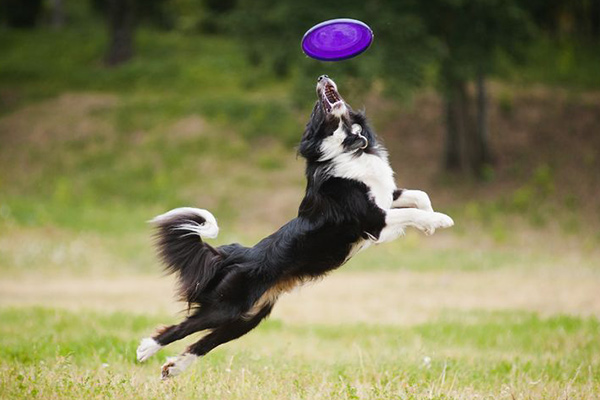
Take Photos of Your Pet in Action
Bonus Tip! Backup Your Photos
Photos of our pets can be priceless, especially as we get older and that photo can become a treasured memory of an old friend. So it’s important to make sure that you keep the photos safe, and don’t risk losing them if you lose your camera or phone, or your computer disk fails.
These days, a lot of photos are taken on smartphones, but if you’re anything like me you don’t always back it up regularly. If you were to lose your phone then you would lose everything on it that wasn’t backed up to online storage, or your computer at home. So make sure you do back up your phone regularly – especially after you’ve taken any photos you particularly like.
Even if you back up your photos to your computer, these can also fail, so you should make sure you copy any important files to an external disk and keep it somewhere safe. Small, external drives are easy to find and relatively cheap – for example this 2TB Portable USB drive would be perfect for backing up a laptop or desktop computer.